
With the features inside Canva, you can easily make one that looks like a graphic designer created it for you.
Templates, easy to use settings, text effects and more, all make designing an eBook simple.
Let’s dive into where to start!
Creating an eBook from scratch in Canva is simple. Just follow this basic process and you can have one ready to add your content in no time.
The first thing to do is to choose your document size.
The most common ones are either US Letter or A4. Both are very similar in size.
Search for them in the design sizes and select. Or choose a custom size you might prefer.
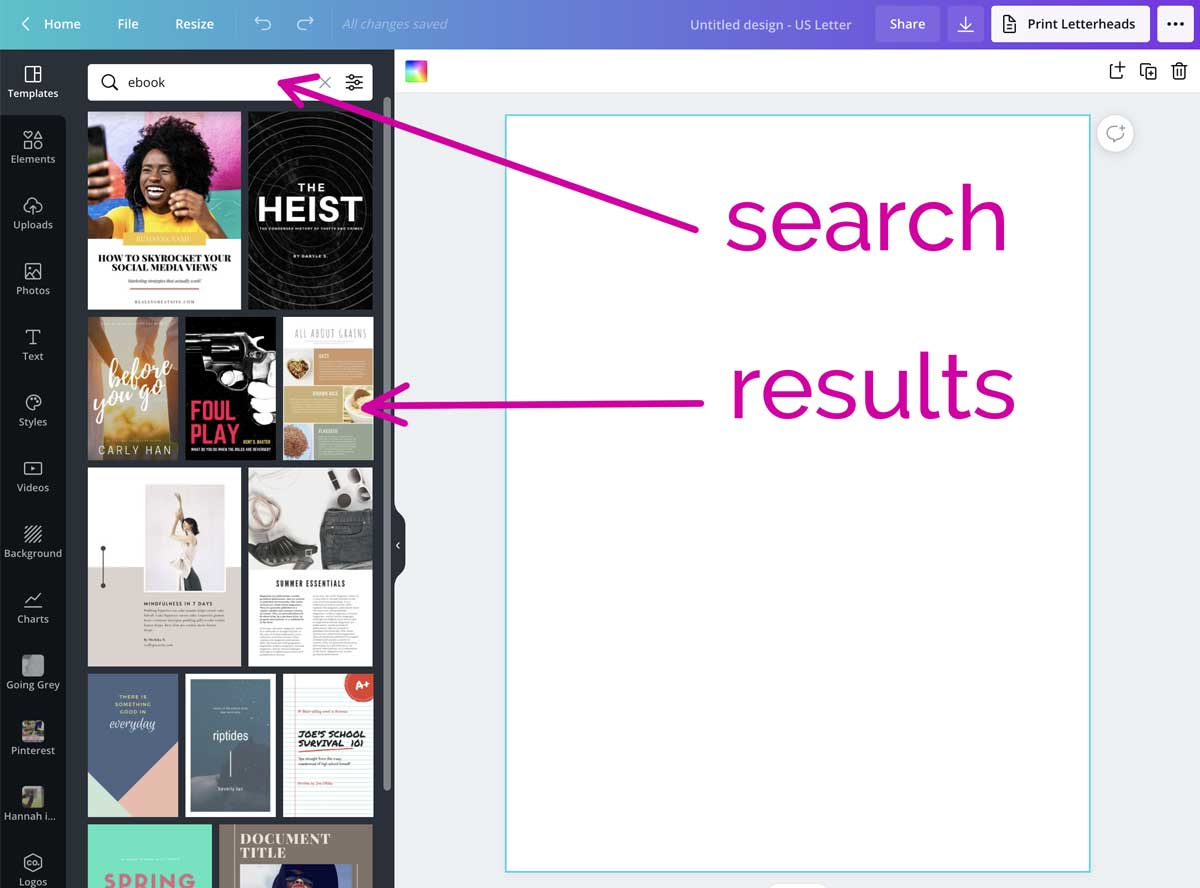
Then go to the Templates tab on the side menu and type ‘ebook.’ You’ll see a range of templates pop up.
Or if you’ve imported a template you bought elsewhere, go to the Folders option and find it.
Most of the Canva templates have more than one page, so you can select the pages you need as you create the eBook.
For example, this Workbook eBook template has 10 pages available.
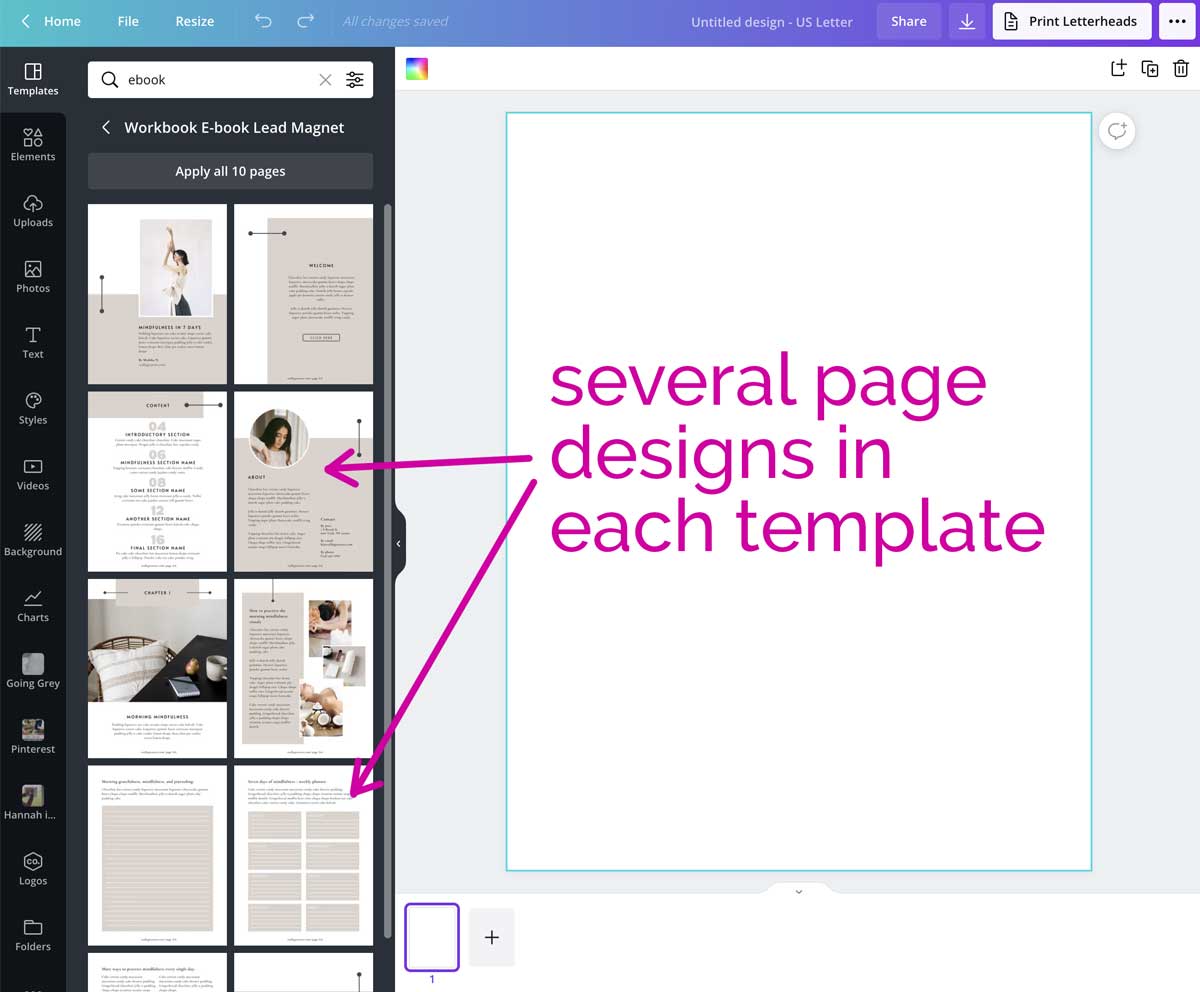
You can either choose to apply all 10 in the order that Canva shows, or you can select the ones you want in the order you need by clicking on the relevant page.
The front or cover page gives the first impression of an eBook, and you’ll use it to promote the product a lot. So creating an eye-catching one is important.
Even if you love the eBook template’s pages, you might want to change the cover if it seems a little understated.
You can apply any design as the cover, and then add the title, branding elements, and images as needed.
You can lay out the whole eBook at once before you start adding content, if you know what you need.
Or you can add one page at a time, adding your content as you go.
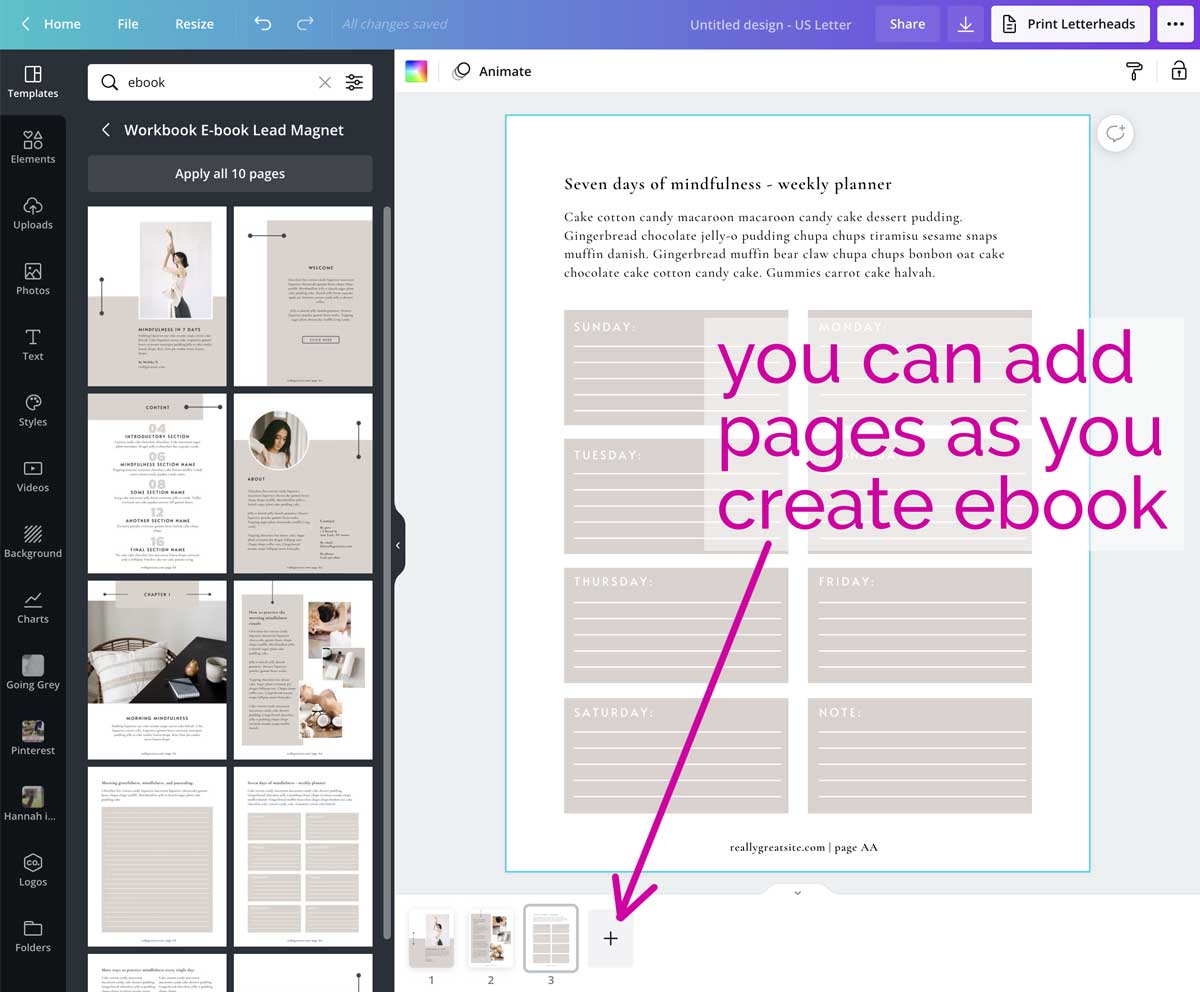
This can be a good option if you have a rough idea of what you want, but are fine-tuning the content and design as you create the book.
So here I used the title page, a content page, then a page with a box for each day of the week.
Along the bottom menu, you can see the pages you have added.
There are several ways to add pages to your document:
Once you’ve created your eBook content, you might want to add a Table of Contents, or Content page, especially if your eBook is longer than just 2-3 sections.
Most template sets have one in them, but if you didn’t use it as you created the content, simply add one now.
Click to create the Content page, then click and drag to move it into position after the cover page.
Or hover beside the cover page and click the ‘add a page’ button, then select the Content template to go into it.
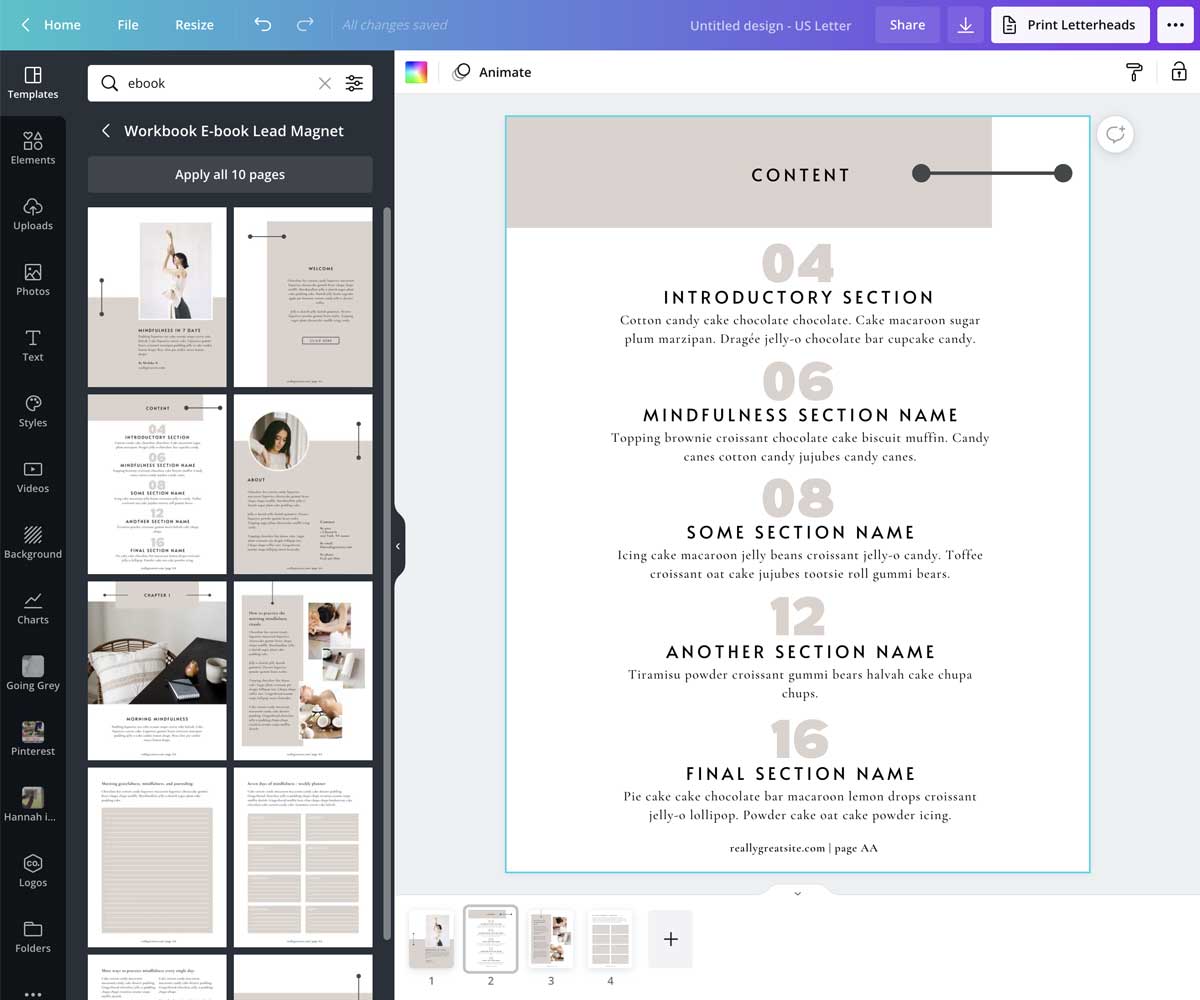
Now amend the page with the chapters or sections of your eBook and their pages.
The final step is optional, and it’s one of the newer features in Canva. You can now link your Content page to the specific pages in the eBook.
This link will be clickable when you download it as a PDF so people can skip to the relevant section.
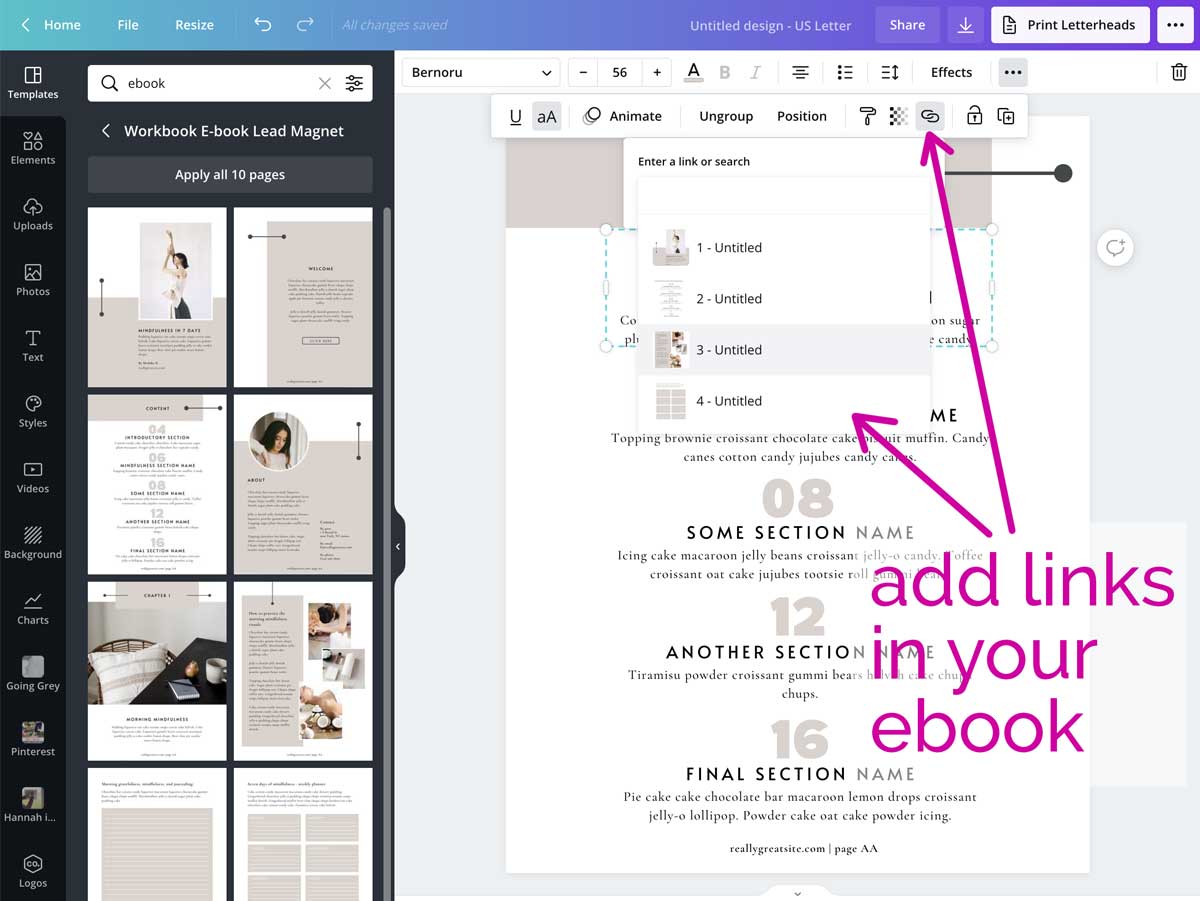
Here I selected the ’04’ and clicked the link option in the menu.
It opened the pages of the document, and I could select the relevant one.
Then after it’s downloaded, clicking the 04 would take you to that page.
This is available on both the free and Canva Pro versions.
Once you’ve created your content, you are ready for a few finishing touches to make it even more appealing to your audience.
If you included a template from a different set, you might find you have different fonts in your eBook. And you want to make sure they’re all the same.
So go through each page and make sure that heading and body text are all in the same font throughout.
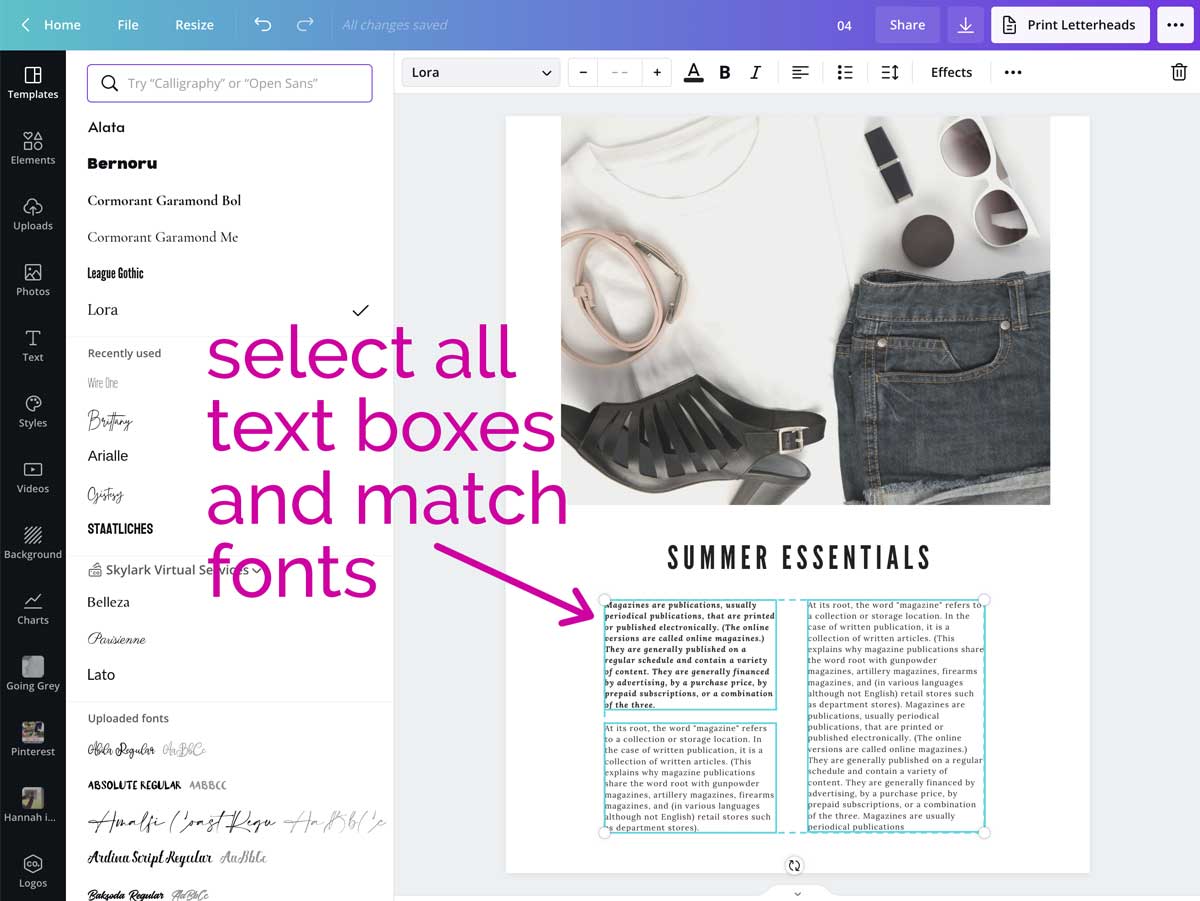
For example, here the body text in most pages is Cormorant Garamond. But the last page uses Lora as the body text.
So simply select all those body text boxes, hit the font option in the menu, and change it to match the rest of the eBook.
There are two approaches to color palettes for these projects.
Either use your usual business colors from your website. Or, you can create a specific color scheme for the project.
Whichever you choose, once you have finished putting the eBook together, you’ll want to change the colors in it to this palette.
Select the first color on the first page and change it to the one you want.
Canva will ask if you want to change all of that color and you can select yes.
Or you can go through each page individually and decide which color you want to have in what part.
The final step might be to add things like stock photos, icons, and other design elements. You don’t want to have too many of these things, but they can add style to an eBook.
Photos can be from inside Canva, or from photos you import. Simply add them into any spots that have frames.
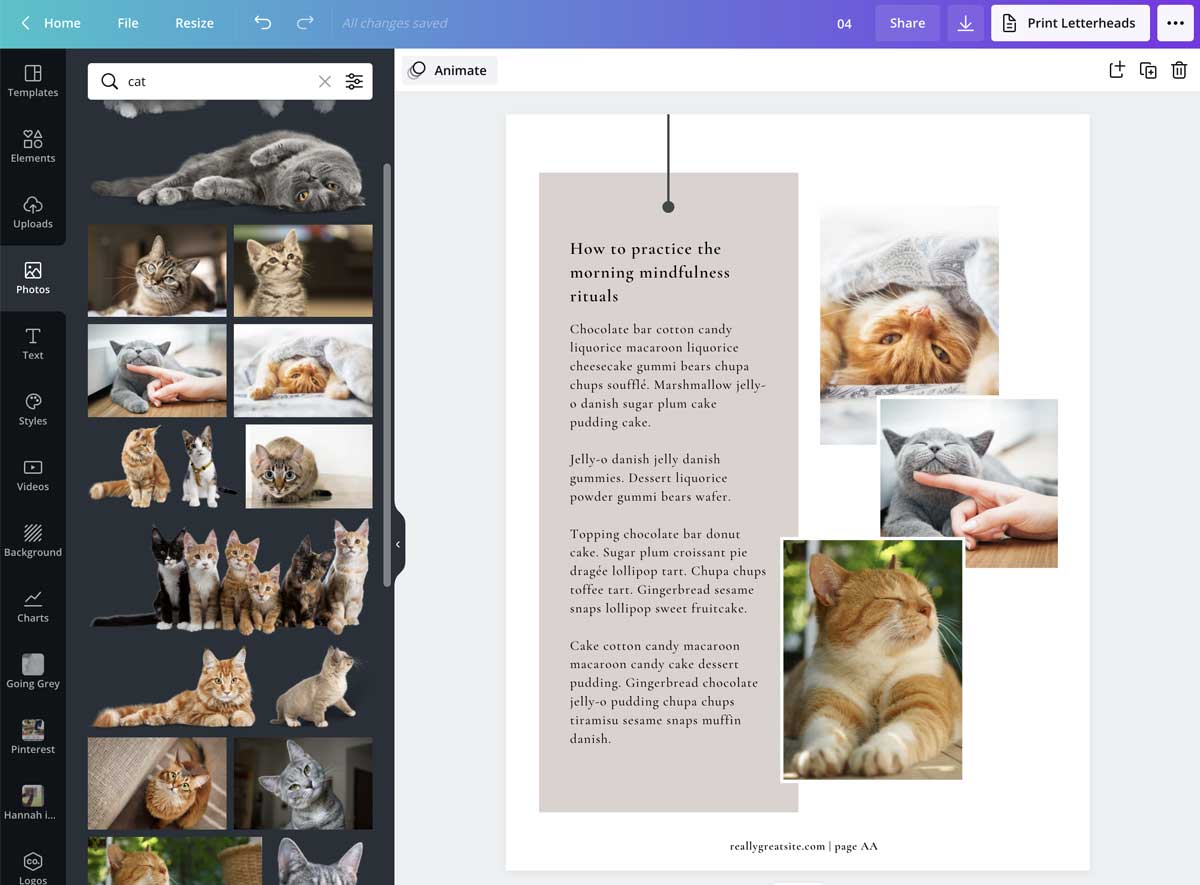
Or add frames to the document to create a place to put the photo.
You can even change some of the text boxes with text effects if you want to make it look less more unique.
There’s no set length for an eBook – you can make it as long as you need it to be.
Lead magnet freebies are often most effective when they’re short, so they’re read before they’re forgotten.
For other kinds of eBooks, here are a few general benchmarks that can help you decide if you want to add more content or stop:
These can give you some ideas, but an eBook can be very short and to the point – it’s up to you!
If you decide you want to change the order of pages, simply click on the page, and drag that page to the location you want it.
You can add new pages by either clicking ‘add new page’ at the end of the pages created. Or if you click a page and hover beside it, the option will appear.
You can also duplicate an existing page, then drag it into position. This is ideal if you want to keep the format but change the text.
You can have as high of a word count as you want in a Canva document. But you can only have up to 100 pages per document.
If you want to make something larger than a 100-page eBook, you’ll need to make two documents.
Download both as PDFs, then use a tool to combine PDF files to make it into a single file.
Once your eBook is finished and proofed, you are ready to download the final item.
It’s best to download it as a PDF file, as this is the right format for eBooks. PDFs allow people to open it and read it on any device, without a special reader.
You can then upload it to your chosen platform to distribute it. Any platform that can handle digital downloads will work perfectly.
It’s also worth downloading a selection of individual pages as a .JPEG or a .PNG. These can then be used in mockups and other graphics to promote your eBook.
You can drop these into templates, use them as they are, or add them to your own designs.
Creating an eBook in Canva is very simple, even with the free version.
With the range of eBook templates, you can easily create high quality digital products. You don’t need a designer to create a branded eBook design.
And you can start selling your eBook to earn income, or give it away to grow your email list!
How will you use eBooks to boost your business?
Love Canva? Try Canva Pro FREE for 30 days! Access 75 million premium image and video assets, exclusive templates, one-click resize, and MORE!
Disclosure: If you purchase a plan, I may earn a commission, at no cost to you.
Want more tutorials?
Find all the Canva tutorials in my ultimate guide on how to use Canva!
Louise Myers is a graphic design expert whose designs have been featured by Disney, Macy's, WalMart and more. Her straightforward writing style empowers small business owners to make their own graphics for social media success!
Hi Louise,
I’d like to learn how to start an ebook from beginning to the end. Just for my project, not business. Can you tutor me and tell me tuition. Thanks a lot
Try Fiverr or Upwork for a tutor, or someone to do it for you. If it’s a one-off that might cost less!